

Before the baby shower, I was walking around Joann’s to get ideas and I stumbled upon a Martha Stewart pre-made white paper pom pom. It was on sale for $16.99. Are you kidding me? For one? I knew I liked the idea of them hanging above the dessert table but I wasn’t about to pay $17 a piece, so I came home and watched a YouTube vide and did a little Pinterest search to figure out how to make them.
Now, most tutorials you’ll find will say paper pom poms are so easy. Theoretically they are because you only need tissue paper, scissors and something to to tie it with but I’ve found that it can be a very delicate process. The tissue paper can and will rip if you’re not too careful, the ball might look too full and be difficult to work with if you use too many sheets of paper and the shape of the tissue paper you use can determine your success. With that being said, after a couple trial pom poms, here is the process I used that I found to be the most helpful.
First off, here is the material I gathered from the Dollar Tree: one 25 sheet pack of pastel tissue paper (20 in x 20 in) and one 40 pack of pipe cleaners. If you decide to get your tissue paper from the Dollar Tree (which I highly recommend because you can make paper pom poms for about 50 cents each) then just know that it’s going to be a little bit more work because you will need the tissue paper to be rectangular shaped (one side shorter than the other).
To make a 15 in diameter pom pom:
Grab 12 sheets of the 20″x20″ tissue paper and cut off 5″ from one side, rendering 20″x15″ sheets. Place the paper so that the short side is in front of you.

Begin folding the paper like an accordion in one inch increments.

When you get to the end, grab a pipe cleaner and wrap it around the center.

Then cut off of the ends so you have arrow like points. I recommend cutting small sections at a time.

Then gently pull one sheet at a time out to the side.

After you do that on both sides you’ll have a ball that looks like this.

A fun way to vary up the paper pom poms is to make different sizes and use different colors. For the baby shower I used 15 in and 10 in diameter poms. And I made the lavender and yellow poms by layering a white sheet in between each lavender and yellow sheet. If you make 10 in poms, only use 10 sheets. When I was done, we hung them with fishing line and thumb tacks.

Another thing I made for the surprise portion of the day was a paper flower wedding bouquet.

You’ll want to start by making the flowers. The good thing is, you make the flowers the same way you make the paper pom poms! The only difference is you use less sheets, cut them smaller, and the pipe cleaners serve a double purpose, holding the flower in place, and creating a stem. I used 5 sheets for most of the flowers and cut the sheets to about 5 in by 12 – 15 in. Oh and play around with the edges. Cut some edges to a point and round some.
Once all your flowers are made, you’ll want to grab these materials, or at least this is what I used. Floral tape, mini ribbon flowers, and pearl floral stems.

Grab all your flower and some pearl stems and arrange them how you like. Don’t be surprised if this part takes a long time. Once you have it arranged how you like, use the floral tape to wrap around the bouquet from the bottom to the top of the pipe cleaner stems. Make sure to pull the floral tape tight so it get’s sticky, but not too tight or it will break. You will then have a bouquet that looks like this.
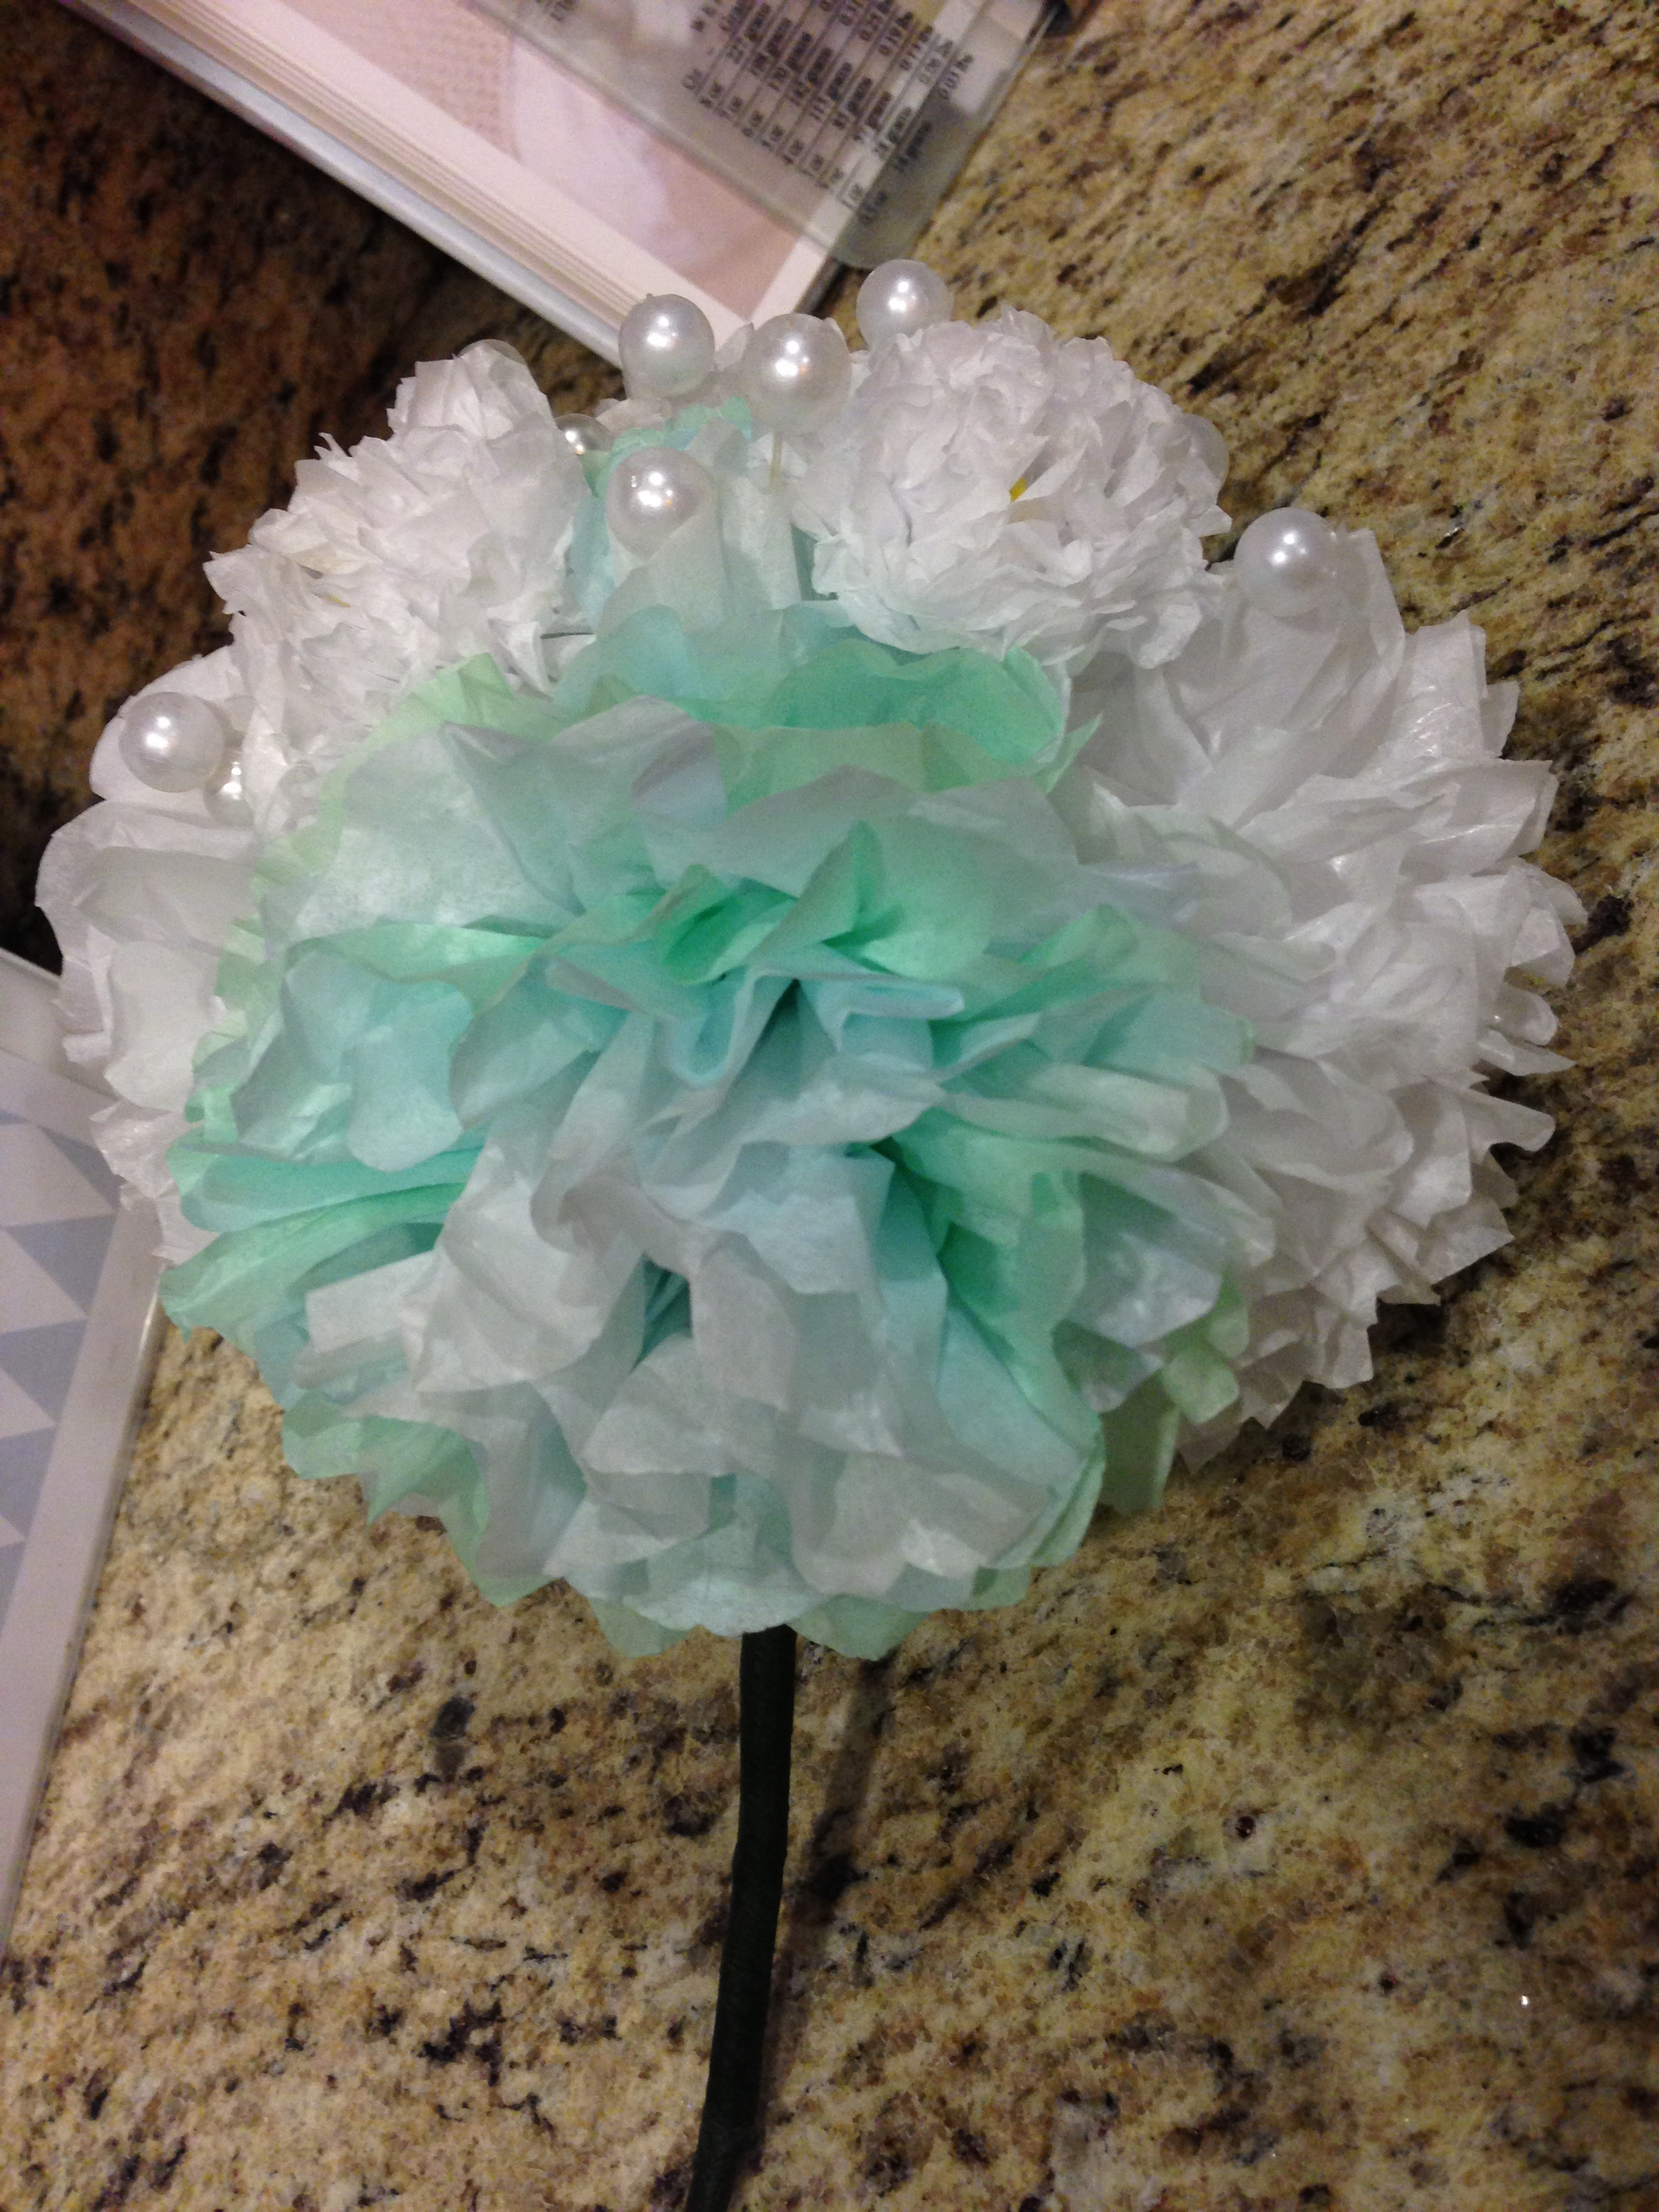
It’s hard to tell from this picture, but the pipe cleaner actually shows in the center of the flower. That is why you need the mini ribbon flowers. I used a glue gun and glued one mini ribbon flower in the center of each paper flower. Then I had to bulk up the stem. You can use whatever you have on hand. My coworker suggested a wooden dowel but I didn’t have any. Instead, I cut about 5 pieces of fake floral stems and wrapped those around the pipe cleaner stems using more floral tape. Lastly, I used my glue gun to wrap white ribbon all around.

And the last thing you need is to find a bride willing to use it.

So, any paper pom pom or flower bouquet making in your future? Let me know how it works out for you!
This post is linked to:


Thanks for the how to but I prefer the go to method, I go to you and ask my ever creative daughter to make them for me. You did a great job and the color scheme was beautiful. You had such a beautiful bride to show off your hard work too. Elena we are all so lucky you are a DIY person, we just sit back and enjoy.
Wow Elena, I didn’t realize that you made them..You are good!! keep up the fun.
These are always awesome, I never thought to use them as a bouquet! I’ve made them in the past here: http://www.envirocraftiness.com/2012/10/what-do-you-do-when-you-have-hole-in.html and here: http://www.envirocraftiness.com/2012/09/bridal-shower.html
Those are beautiful 🙂 Thanks for joining us this week at the Let’s get social Sunday party. Have a wonderful week!
Pingback: A 60th Raclette Party | The Silberez Life
Pingback: A Baby Shower with a Surprise Wedding Part 1 | The Silberez Life
Pingback: The Non-Traditional Bouquet |